Create an AI agent using MetaMask SDK
This tutorial walks you through creating an AI agent dapp that can display your wallet balance and initiate transactions from your wallet, on the Linea Sepolia network. You will use a provided template, which sets up MetaMask SDK and Vercel's AI SDK with a Next.js and Wagmi dapp.
Prerequisites
- Node.js version 18 or later and pnpm installed
- An OpenAI API key, with some credit balance available
- MetaMask installed, with an account that has Linea Sepolia ETH
note
You can use the MetaMask faucet to get Linea Sepolia ETH.
Steps
1. Set up the project
-
Clone the
Consensys/wallet-agentrepository:git clone git@github.com:Consensys/wallet-agent.git -
Switch to the
initial-setupbranch:cd wallet-agent && git switch initial-setup -
Install dependencies:
npm install -
Create a
.env.localfile:touch .env.local -
In
.env.local, add anOPENAI_API_KEYenvironment variable, replacing<YOUR-API-KEY>with your OpenAI API key. Vercel's AI SDK will use this environment variable to authenticate your dapp with the OpenAI service..env.localOPENAI_API_KEY=<YOUR-API-KEY>
2. Create the dapp interface
In app/page.tsx, use the useAccount, useConnect, and useDisconnect hooks from Wagmi, along with the Wagmi MetaMask SDK connector to create a button to connect and disconnect your MetaMask wallet.
Use the Chat component to display the AI agent chat interface.
+ "use client";

+ import { useAccount, useConnect, useDisconnect } from "wagmi";
+ import { metaMask } from "wagmi/connectors";
+ import { Button } from "@/components/ui/button";
+ import { Chat } from "@/components/Chat";
import Image from "next/image";

+ const ConnectButton = () => {
+   const { connect } = useConnect();
+   const { address, isConnected } = useAccount();
+   const { disconnect } = useDisconnect();
+
+   return (
+     <div className="mx-auto">
+       {isConnected ? (
+         <Button onClick={() => disconnect()}>Disconnect {address}</Button>
+       ) : (
+         <Button onClick={() => connect({ connector: metaMask() })}>Connect</Button>
+       )}
+     </div>
+   );
+ };

export default function Home() {
+ const { isConnected } = useAccount();
  return (
    <div className="h-screen w-full overflow-y-auto grid grid-rows-[20px_1fr_20px] items-center justify-items-center min-h-screen p-8 pb-20 gap-16 sm:p-20 font-[family-name:var(--font-geist-sans)]">
      <main className="gap-8 row-start-2 sm:items-start h-full w-full">
        <h1>Wallet Agent setup</h1>
+       <ConnectButton />
+       { isConnected ? <Chat /> : null}
      </main>
      // ...
To test the interface, run the development server and navigate to http://localhost:3000:
npm run dev
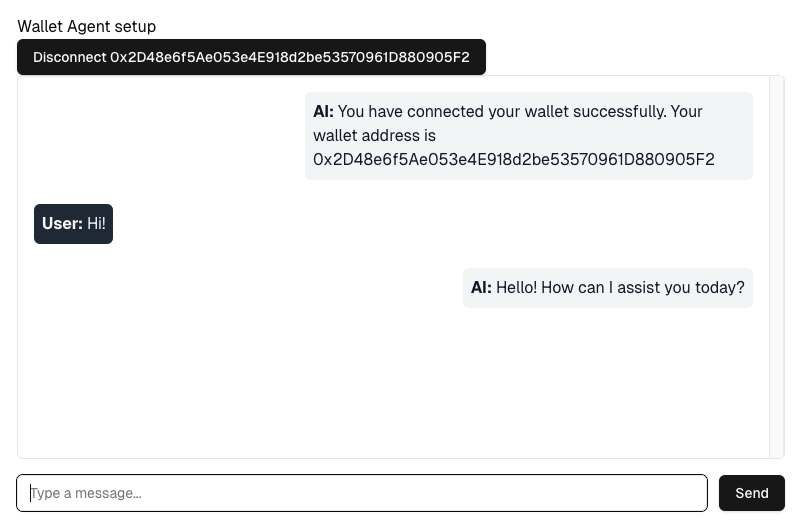
Test that the button works to connect and disconnect from your MetaMask wallet. When connected, the AI agent chat interface displays with your connected wallet address. You can test the AI functionality by sending messages in the chat:

3. Create a Public Client
In wagmi.config.ts, initialize a Viem Public Client
with the Linea Sepolia chain.
This Public Client will enable the AI agent to access public JSON-RPC API methods such as retrieving balances:
+ import { createPublicClient } from "viem";
import { createConfig, http, cookieStorage, createStorage } from "wagmi";
import { lineaSepolia, linea, mainnet } from "wagmi/chains";
import { metaMask } from "wagmi/connectors";

+ export const publicClient = createPublicClient({
+   chain: lineaSepolia,
+   transport: http(),
+ });

export function getConfig() {
// ...
4. Create a tool to get the balance
Use the AI SDK's tools feature to enable the AI agent to perform specific tasks.
In ai/tools.ts, update or remove the example tool.
Use the getBalance method of your configured Public Client, and Viem's formatEther function to create a tool that retrieves the ether balance of the connected wallet:
+ import { publicClient } from "@/wagmi.config";
+ import { formatEther } from "viem";
import { tool as createTool } from "ai";
import { z } from "zod";

- const tool = createTool({
-   description: "Example tool",
-   parameters: z.object({
-     name: z.string().describe("The name of the user"),
-   }),
-   execute: async ({ name }) => {
-     return { name };
-   },
- });
+ const balanceTool = createTool({
+   description: "Get the balance of the connected wallet",
+   parameters: z.object({
+     address: z.string().describe("The address of the user"),
+   }),
+   execute: async ({ address }) => {
+     const balance = await publicClient.getBalance({
+       address: address as `0x${string}`,
+     });
+     return { balance: formatEther(balance) };
+   },
+ });

export const tools = {
-   example: tool,
+   displayBalance: balanceTool,
};
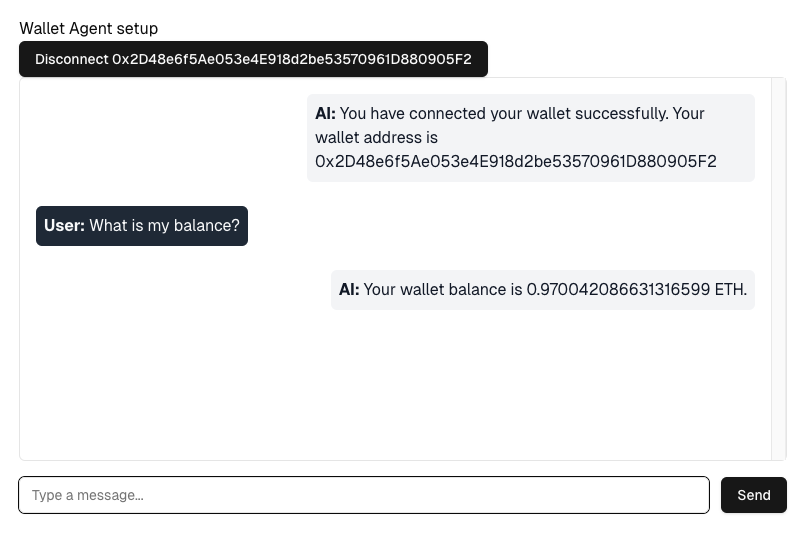
In the development server, test that this tool works to get your current Linea Sepolia ETH balance:

5. Create a tool to send transactions
In ai/tools.ts, create another tool to send transactions.
In this example, the tool and the Chat.tsx component are configured to initiate a transaction and provide a button for you to send the transaction.
You only need to make the following changes to the tools.ts file:
- ai/tools.ts
- components/Chat.tsx
import { publicClient } from "@/wagmi.config";
import { formatEther } from "viem";
import { tool as createTool } from "ai";
import { z } from "zod";

const balanceTool = createTool({
  // ...
});

+ const sendTransactionTool = createTool({
+   description: "Initiate a transaction to the provided wallet address",
+   parameters: z.object({
+     to: z.string().describe("The wallet address of the user"),
+     amount: z.string().describe("The amount of ether to send"),
+   }),
+   execute: async ({ to, amount }) => {
+     return { to, amount };
+   },
+ });

export const tools = {
  displayBalance: balanceTool,
+ sendTransaction: sendTransactionTool,
};
// ...
if (toolName === 'sendTransaction') {
  const { result }: { result: { to: string; amount: string } } = toolInvocation

  if (isLoading) {
    return (
      <div key={toolCallId}>
        <p>Loading...</p>
      </div>
    )
  }

  return (
    <div key={toolCallId}>
      <Button
        className="bg-orange-600 text-orange-100 py-2 px-5 rounded-sm w-fit"
        onClick={() =>
          sendTransaction({
            to: result.to as `0x${string}`,
            value: parseEther(result.amount),
          })
        }>
        Send Transaction
      </Button>
      <p>{hash ? `Transaction sent: ${hash}` : 'Transaction not sent'}</p>
    </div>
  )
}
// ...
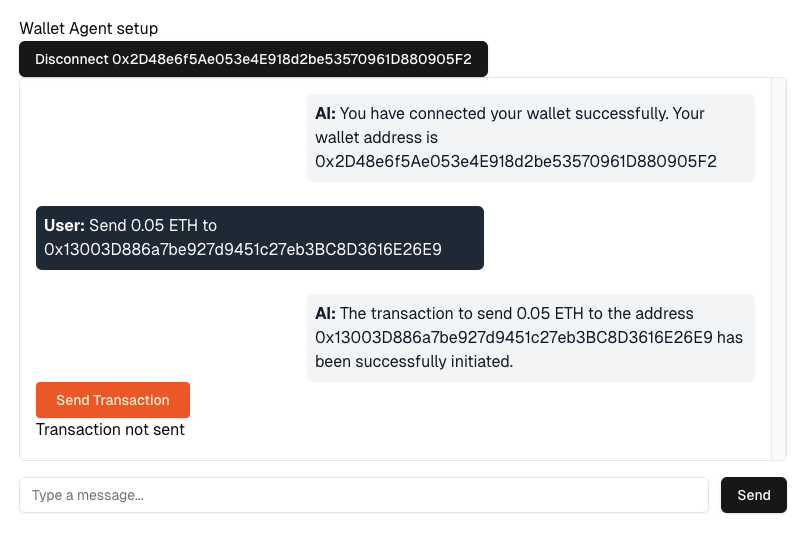
In the development server, test that this tool works to send Linea Sepolia ETH from your connected address to the address you provide.
When you request the agent to send a transaction, it will provide a button for you to send the transaction, but it will not send it for you:

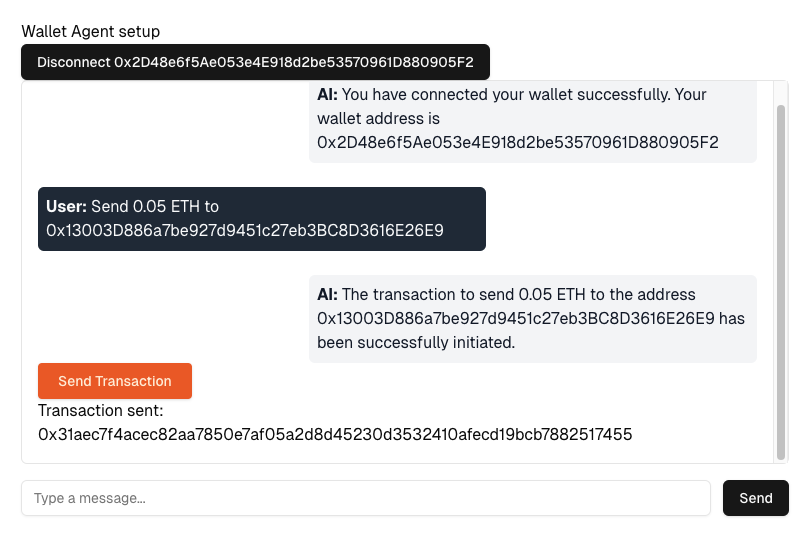
When you select the button and confirm the transaction in MetaMask, the transaction will be sent:

You can check the status of the transaction in the Linea Sepolia block explorer.
You can configure the AI agent to directly send the transaction using a Viem Wallet Client.
Resources
- View the main branch of the
Consensys/wallet-agenttemplate for the completed implementation of this tutorial. - Watch the live coding session on YouTube, in which the MetaMask DevRel team walks through creating a wallet AI agent from the initial template.