Display tokens
When a user opens MetaMask, they're shown some major tokens by default. However, to display most custom ERC-20 tokens, the user must turn on token autodetection or add the token manually. To display a user's NFTs, the user must turn on NFT autodetection or add their NFTs manually.
Manually adding tokens involves the user interacting with contract addresses, and is error-prone.
Improve the security and experience of displaying your
ERC-20 token or users' NFTs in MetaMask by using the
wallet_watchAsset RPC method.
wallet_watchAsset provides a friendly interface that prompts users to register tokens to their
MetaMask wallet, without having to interact with contract addresses.
With wallet_watchAsset, prompt users to add their ERC-20 tokens and NFTs even when they
have token autodetection or NFT autodetection disabled.
Also, token autodetection only detects ERC-20 tokens on
certain networks,
and NFT autodetection only detects NFTs on Ethereum Mainnet.
With wallet_watchAsset, users can add tokens from other networks.
Using wallet_watchAsset to display NFTs is experimental and currently only available on the
extension (not on mobile).
Prerequisites
Follow the quickstart to install, initialize, and connect the EVM client.
Display an ERC-20 token
To prompt users to add an ERC-20 token, add something like the following to your project script:
import { createEVMClient } from '@metamask/connect-evm'

const evmClient = await createEVMClient({
  dapp: {
    name: 'MetaMask Connect EVM Example',
    url: window.location.href,
    iconUrl: 'https://mydapp.com/icon.png', // Optional
  },
  api: {
    supportedNetworks: {
      '0x1': 'https://mainnet.infura.io/v3/YOUR_INFURA_API_KEY',
      '0xaa36a7': 'https://sepolia.infura.io/v3/YOUR_INFURA_API_KEY',
    },
  },
})
const provider = evmClient.getProvider()

const tokenAddress = '0xd00981105e61274c8a5cd5a88fe7e037d935b513'
const tokenSymbol = 'TUT'
const tokenDecimals = 18
const tokenImage = 'http://placekitten.com/200/300'

try {
  // 'wasAdded' is a boolean. Like any RPC method, an error can be thrown.
  const wasAdded = await provider.request({
    method: 'wallet_watchAsset',
    params: {
      type: 'ERC20',
      options: {
        // The address of the token.
        address: tokenAddress,
        // A ticker symbol or shorthand, up to 5 characters.
        symbol: tokenSymbol,
        // The number of decimals in the token.
        decimals: tokenDecimals,
        // A string URL of the token logo.
        image: tokenImage,
      },
    },
  })

  if (wasAdded) {
    console.log('Thanks for your interest!')
  } else {
    console.log('Your loss!')
  }
} catch (error) {
  console.log(error)
}
If the chain ID of your token doesn't match the user's network, they can get unexpected results. We recommend detecting the user's network chain ID and prompting them to switch chains, if necessary.
For another example, WatchToken is a live web dapp that lets you enter your token details and share them using a web link.
Display NFTs
Using wallet_watchAsset to display NFTs is experimental and currently only available on the
extension (not on mobile).
See MIP-1
and the MIP proposal lifecycle
for more information.
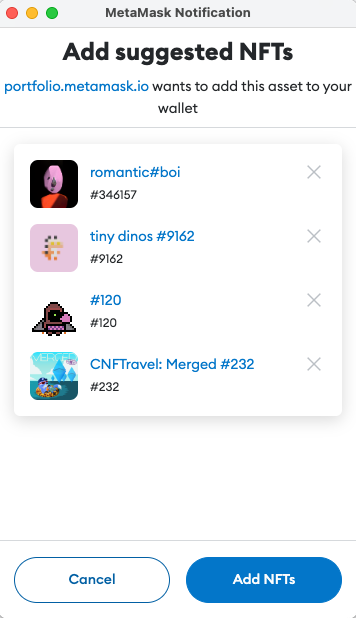
Prompt users to add a single NFT or multiple NFTs using wallet_watchAsset.
The add NFT interfaces look like the following:
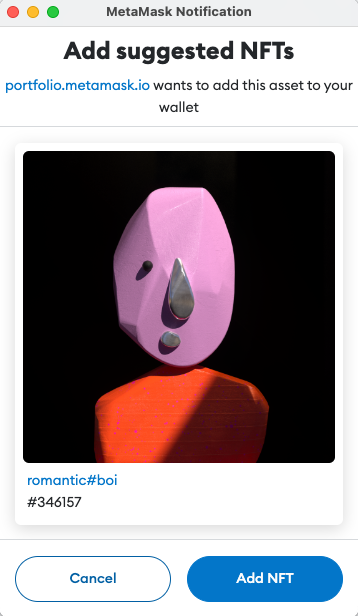
Display a single NFT
To prompt users to add a single NFT, add something like the following to your project script.
wallet_watchAsset supports both ERC-721 and ERC-1155 NFT standards.
import { createEVMClient } from '@metamask/connect-evm'

const evmClient = await createEVMClient({
  dapp: {
    name: 'MetaMask Connect EVM Example',
    url: window.location.href,
    iconUrl: 'https://mydapp.com/icon.png', // Optional
  },
  api: {
    supportedNetworks: {
      '0x1': 'https://mainnet.infura.io/v3/YOUR_INFURA_API_KEY',
      '0xaa36a7': 'https://sepolia.infura.io/v3/YOUR_INFURA_API_KEY',
    },
  },
})
const provider = evmClient.getProvider()

try {
  // wasAdded is a boolean. Like any RPC method, an error can be thrown.
  const wasAdded = await provider.request({
    method: 'wallet_watchAsset',
    params: {
      type: 'ERC721', // Or "ERC1155".
      options: {
        // The address of the token.
        address: '0x742d35Cc6634C0532925a3b844Bc454e4438f44e',
        // ERC-721 or ERC-1155 token ID.
        tokenId: '1',
      },
    },
  })

  if (wasAdded) {
    console.log('User successfully added the token!')
  } else {
    console.log('User did not add the token.')
  }
} catch (error) {
  console.log(error)
}
Display multiple NFTs
To prompt users to add multiple NFTs, use sendAsync instead of
request to call wallet_watchAsset.
For example:
provider.sendAsync([{
    method: "wallet_watchAsset",
    params: {
      type: "ERC721",
      options: {
        address: contractAddress,
        tokenId: 1,
      },
    }
  }, {
    method: "wallet_watchAsset",
    params: {
      type: "ERC721",
      options: {
        address: contractAddress,
        tokenId: 2,
      },
    },
  },
  ...
])