Project Settings
The project settings section of the Embedded Wallets dashboard allows developers to manage core configuration options for each project. These settings determine how the project integrates with the Embedded Wallets SDK and how it behaves across different environments.
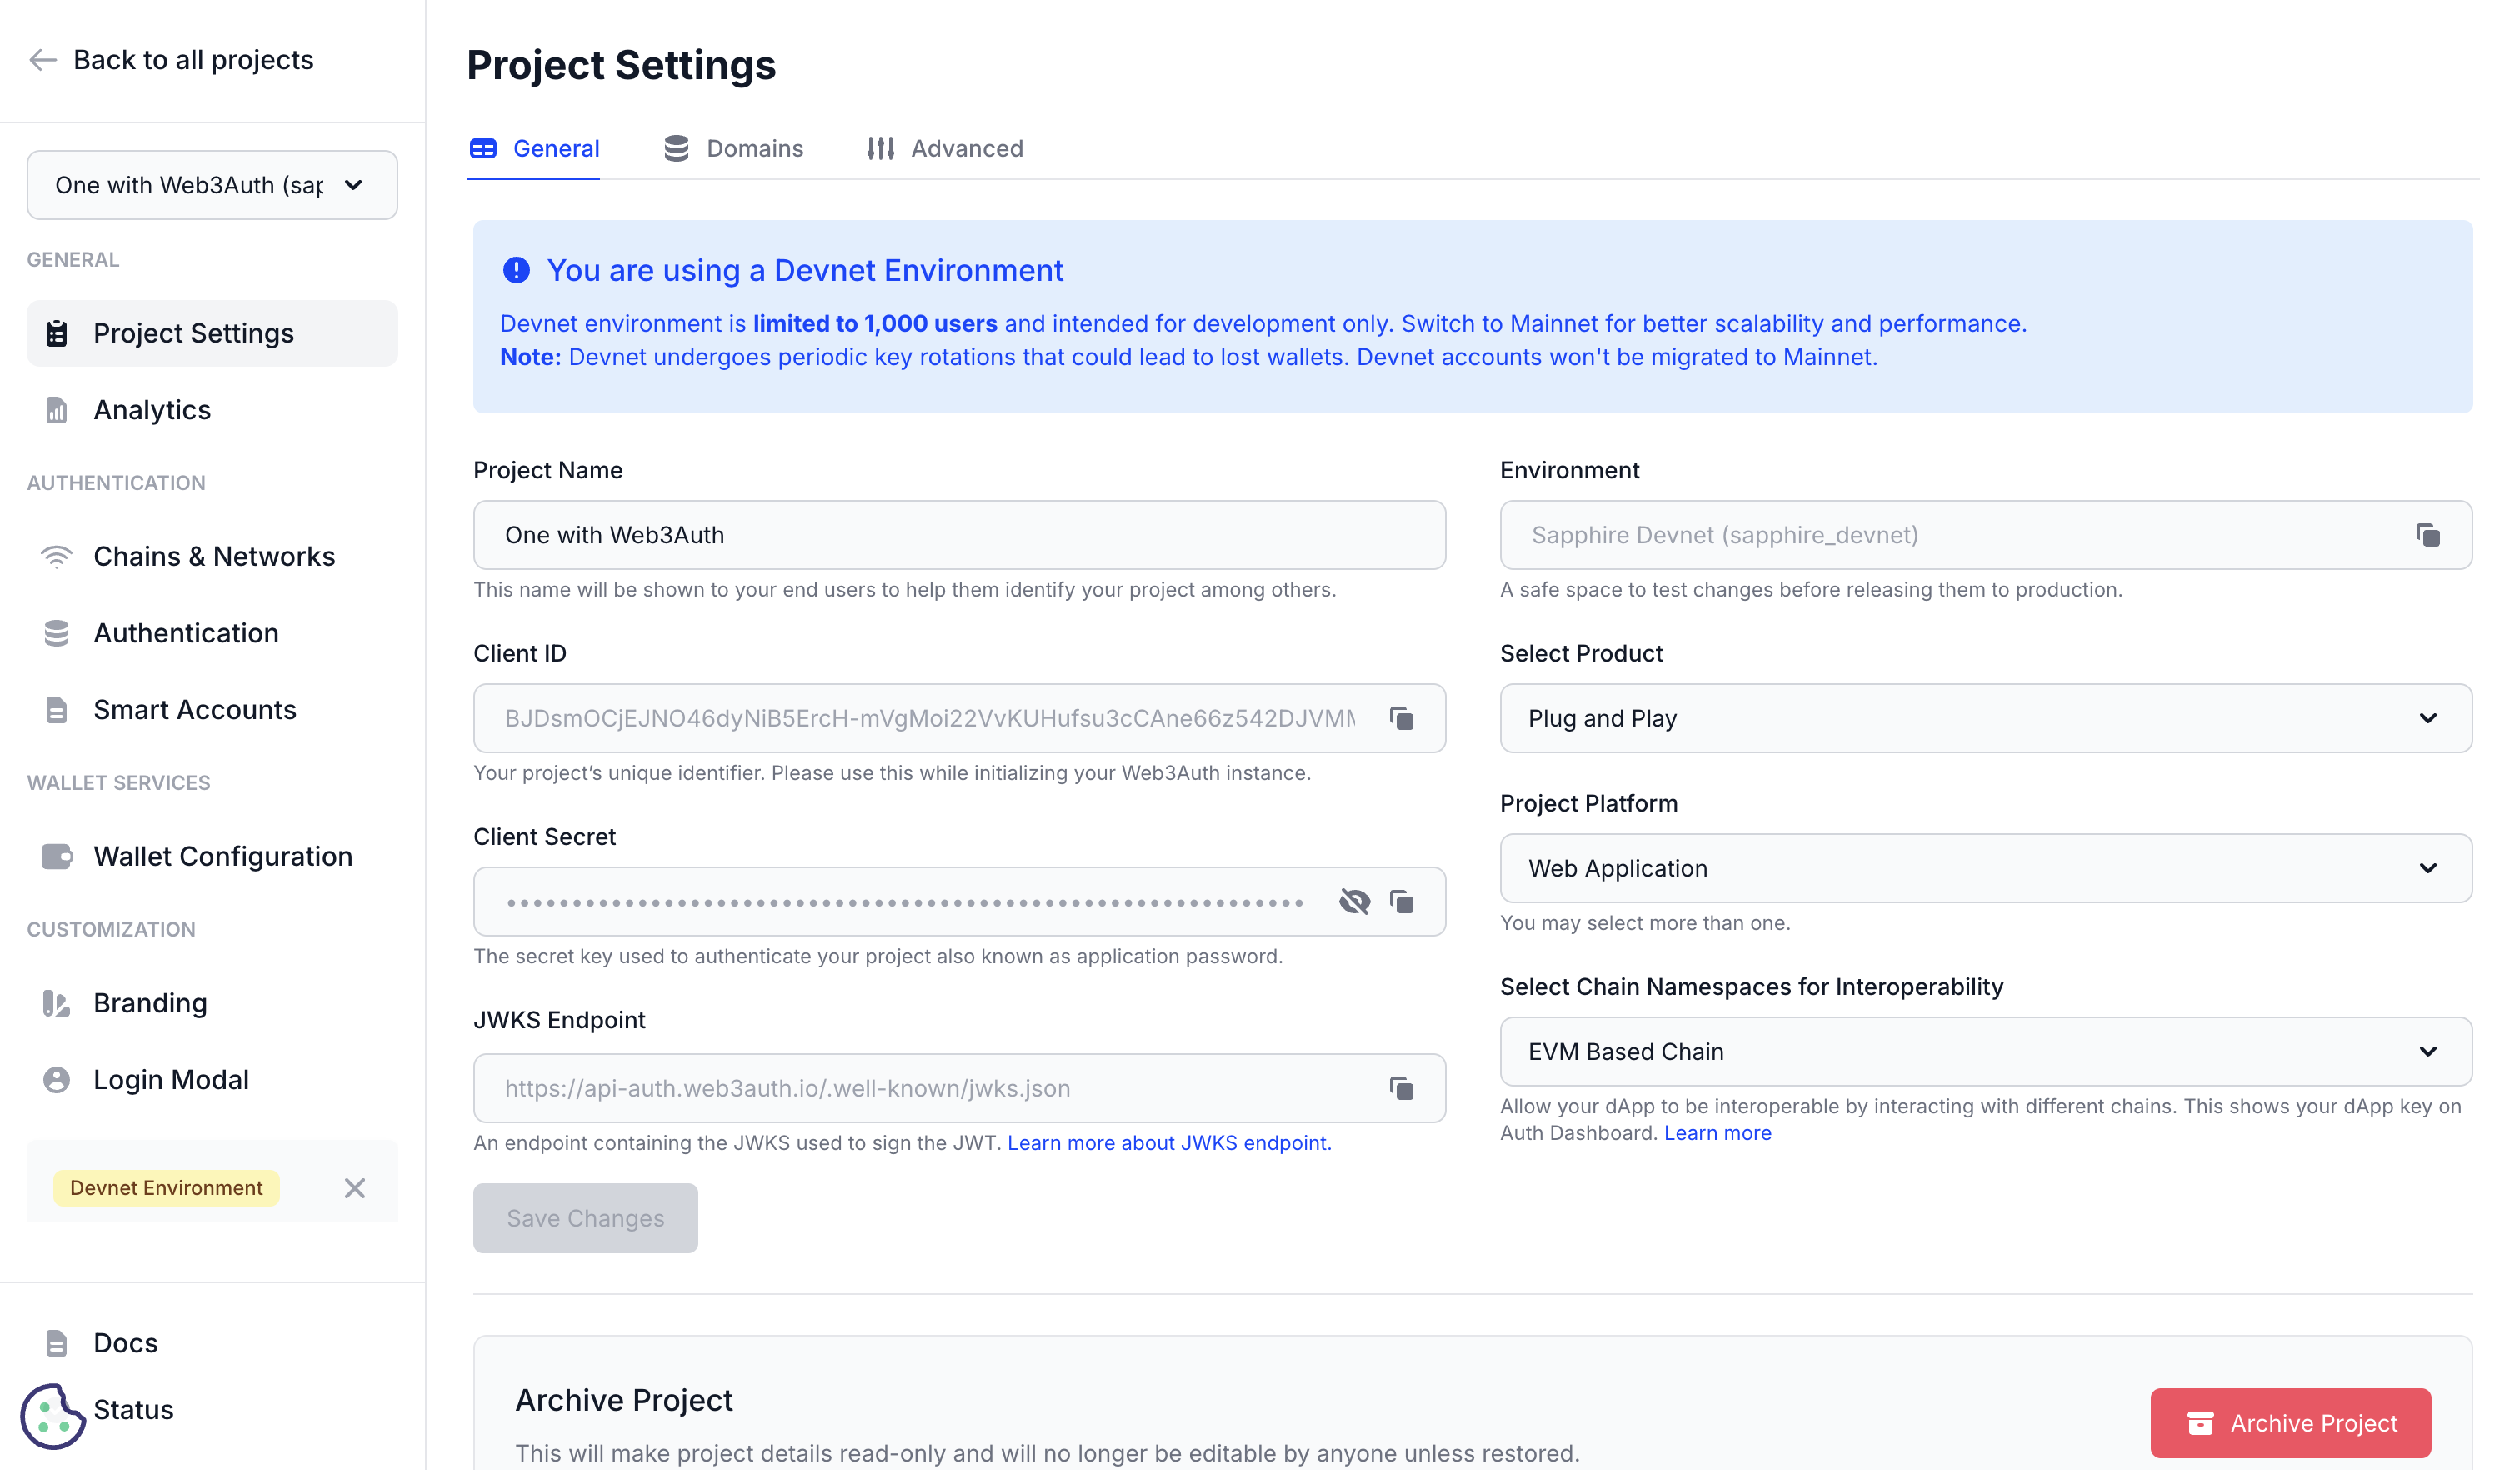
Project information
Project name
This is the name of the project that will be displayed to users during the Web3Auth login flow and in any related email communication. The project name serves as your application's identity in the Web3Auth ecosystem. It can be modified at any time after project creation.
The name appears in:
- User-facing displays: Appears in login modals and authentication flows
- Email communications: Used in Web3Auth-generated emails to users
- Dashboard identification: Helps you identify projects in your dashboard
- Use a clear, recognizable name that matches your application
- Keep it concise but descriptive
- Avoid special characters that might cause display issues
- Consider how it will appear to end users
Environment
This indicates the Web3Auth environment selected during project creation. The environment determines the infrastructure tier and security level of your project. Two globally distributed and highly scalable environments are available:
- Sapphire Devnet: Development environment for testing and integration
- Sapphire Mainnet: Production environment for live applications
- Cannot be modified after project creation
- Each environment has separate user bases and data isolation
- Production applications should use Sapphire Mainnet
Project platform
Developers can select from a wide range of platform options depending on the nature of their application. This setting helps optimize the SDK behavior and available features for the specific platform:
- Web: Browser-based applications (React, Vue, JavaScript)
- Mobile: Native mobile applications (Android, iOS, React Native, Flutter)
- Gaming: Game development platforms (Unity, Unreal Engine)
Each platform offers specific features:
- Different SDK packages and integration methods
- Platform-optimized authentication flows
- Tailored documentation and examples
- Specific security considerations
Authentication credentials
Client ID
A unique identifier automatically generated for each project. This is the primary credential used to authenticate your application with Web3Auth services. This ID is:
- Publicly safe: Can be exposed in client-side code
- Required for integration: Essential for all SDK implementations
- Unique per project: Each project receives a distinct Client ID
- Immutable: Cannot be changed after generation
Implementation example
import { Web3Auth } from '@web3auth/modal'

const web3auth = new Web3Auth({
  clientId: 'YOUR_CLIENT_ID_HERE', // Safe to expose publicly
  web3AuthNetwork: 'sapphire_mainnet',
})
Client secret
A confidential key used for authenticating server-side API requests and advanced integrations. This credential provides elevated access to Web3Auth services.
The client secret must never be exposed in frontend or client-side code, mobile applications, or any publicly accessible environment. Exposure could compromise your project's security.
- Server-side only: Use exclusively in backend services
- Secure storage: Store in environment variables or secure vaults
- Rotation capability: Can be regenerated if compromised
The client secret is used for:
- Server-side user verification
- Administrative operations
- Webhook signature verification
- Advanced API integrations
Token verification
JWKS endpoint
A public endpoint that exposes the JSON Web Key Set (JWKS) used by Web3Auth to sign JWTs. This endpoint enables you to verify the authenticity of identity tokens issued by Web3Auth, providing the following benefits:
- Dynamic key rotation: Automatically receives updated signing keys
- Industry standard: JWKS is a widely adopted standard for JWT verification
- High availability: Backed by Web3Auth's global infrastructure
- Real-time updates: Always provides current verification keys
Using the JWKS endpoint
Pass the request to the JWKS endpoint with your project ID as the identifier:
https://api.web3auth.io/jwks?project_id=<YOUR_PROJECT_ID>
Implementation example
import jwt from 'jsonwebtoken'
import jwksClient from 'jwks-rsa'

const client = jwksClient({
  jwksUri: 'https://api.web3auth.io/jwks?project_id=YOUR_PROJECT_ID',
})

function getKey(header, callback) {
  client.getSigningKey(header.kid, (err, key) => {
    const signingKey = key.publicKey || key.rsaPublicKey
    callback(null, signingKey)
  })
}

// Verify token
jwt.verify(token, getKey, options, (err, decoded) => {
  if (err) {
    console.error('Token verification failed:', err)
  } else {
    console.log('Token verified:', decoded)
  }
})
Project verification key
An alternative to using the JWKS endpoint, this static key allows for token verification without depending on external JWKS URL calls. While providing less security, this offers the following advantages:
- Offline verification: No external API calls required
- Reduced latency: Faster token verification process
- Network independence: Works in environments with limited connectivity
- Simplified implementation: Single key verification logic
The project verification key is suitable for:
- Applications with strict latency requirements
- Environments with limited internet access
- Simplified verification workflows
- Backup verification method
Implementation example
import jwt from 'jsonwebtoken'

const PROJECT_VERIFICATION_KEY = `-----BEGIN PUBLIC KEY-----
YOUR_PROJECT_VERIFICATION_KEY_HERE
-----END PUBLIC KEY-----`

// Verify token with static key
jwt.verify(token, PROJECT_VERIFICATION_KEY, { algorithms: ['RS256'] }, (err, decoded) => {
  if (err) {
    console.error('Token verification failed:', err)
  } else {
    console.log('Token verified:', decoded)
  }
})
Project management
Archive project
The archive project feature allows you to deactivate a project while preserving its configuration and data. This is useful for temporarily disabling projects or maintaining historical records.
Archive Effects:
- Read-only mode: Project becomes non-functional but viewable
- Authentication disabled: Users cannot log in to archived projects
- Data preservation: All configuration and user data is retained
- Reversible: Projects can be restored from archived state
When to Archive:
- Temporary project suspension
- End-of-life applications
- Testing environment cleanup
- Compliance requirements
Restoration Process:
- Archived projects can be restored through the dashboard
- All settings and configurations are preserved
- User data and authentication flows resume normally
- No data loss occurs during archive/restore cycles
Archiving preserves all project data and allows for restoration. If you need to permanently remove a project, contact Embedded Wallets support for assistance with proper data deletion procedures.
Next steps
For comprehensive project configuration, explore these related settings:
- Allowlist settings - Configure domain and URL authorization for enhanced security
- Advanced project settings - Access session management, key export, user data, and testing configurations
Quickstart guide
Essential Configuration Steps:
- Set up your project name and verify environment
- Obtain your Client ID for SDK integration
- Configure domain allowlisting for security
- Set up token verification method
- Review advanced settings as needed
Production deployment checklist
- ✅ All production domains allowlisted
- ✅ Token verification configured
- ✅ Advanced settings reviewed
- ✅ Test accounts disabled
- ✅ Security settings verified